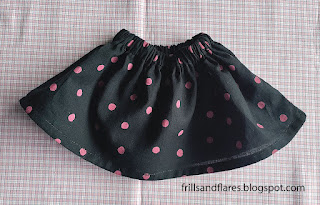
Sewing an elastic waist skirt for an 18-inch doll is a fun and easy beginner project! It's one of the best ways to use your scrap fabrics.
Here's the step-by-step sewing tutorial. The link to the free PDF pattern is given below.
Check out my other free 18-inch doll PDF sewing patterns and tutorials:
Click the link below to browse all the free PDF sewing patterns for women:
Let's dive into the sewing tutorial:
Materials Needed:
Fabric (lightweight cotton or similar. I used a polka dotted lightweight cotton fabric.)
Elastic (1/2-inch width, about 8–10 inches long)
Sewing machine or needle and thread
Sewing pins or clips
Safety pin
---
Instructions:
1. Download the free PDF pattern for the skirt
Download link to the pattern:
18-Inch Doll Gathered Skirt with Elastic Waist---Free PDF Sewing Pattern
This PDF pattern has two pages to print.
This is the pattern assembly diagram:
Print the two pages and cut the left margin of page 2.
2. Cut the Fabric
Fold the fabric in half.
Using the pattern template, cut the long rectangular piece of fabric for the skirt.
3. Sew the Side Seam
Fold the rectangular piece of fabric in half with the right sides together. Align the edges and pin. Sew the side seam with a 1/2-inch seam allowance. Backstitch at the beginning and end for durability.
4. Finish the Side Seam
Trim the seam allowance and finish it with a serger, zigzag stitch or pinking shears to prevent fraying.
5. Hem the Bottom Edge
Fold the bottom edge of the fabric up by 1/4 inch and press.
Fold again another 1/4 inch to hide the raw edges and press.
Pin in place and sew a straight stitch along the folded edge.
This is how it looks on the right side.
6. Create the Waistband
Fold the top edge of the fabric down by 1/4 inch, then fold it again by 3/4 inch to create a casing for the elastic.
Sew close to the folded edge, leaving a 1-inch opening to insert the elastic.
7. Insert the Elastic
Take an 8 to 10-inch-long elastic. (The doll's waist circumference is around 11.5 inches. So the length of the elastic can be 1 to 3 inches lesser than that, depending on the stretchability or elasticity of the elastic and how fitter you want the waist of the skirt to be. For example, the type of elastic I used in this project was a braided elastic that can stretch more. So I used only 8 inches of it.)
I always mark the length on the elastic instead of cutting it out to the correct length, so it will be easier to thread it through the casing.
Attach a safety pin to one end of the elastic and thread it through the waistband casing.
Make sure the other end of the elastic doesn't slip inside the casing by pinning it in place.
8. Sew the Elastic Ends
Once the elastic is fully threaded through, cut through the length marking on one end.
Remove the safety pin from the other end, and overlap the ends by 1/2 inch and sew them together securely using a zigzag stitch or several straight stitches.
9. Adjust and Finish
Distribute the gathers evenly around the waistband.
Close the opening in the waistband with a straight stitch.
Your elastic waist skirt is now complete! We have turned a rectangular piece of fabric into a beautiful skirt! You can sew as many of these doll skirts as you like from all the scrap fabrics you have, as it is very easy to make.
Dress your doll and enjoy the finished look!
I have posted lots of free PDF printable sewing patterns on this page on my blog. Browse through this page to find the patterns you are looking for. You can download and use them to make your own clothes.
Happy sewing!
---Flora


