I had already posted a tutorial on how to draft a basic dress for kids on this page on my blog.
In this sewing tutorial we will see how to sew the basic dress with self-faced cap sleeves and hidden in-seam pockets in the gathered skirt of the dress. I have provided the link to the free sewing pattern below.
These are the fabrics I used for this project.
Click the link below to browse all the free PDF sewing patterns for women:
*This post contains affiliate links, which means I make a small commission at no extra cost to you.
Sewing Supplies Needed:
1. Fabric (I used a vintage-style cotton fabric for the skirt of the dress, which I bought from Amazon. Similar fabric is available here. For the bodice, I used a white polycotton fabric I had in my stash. Similar fabric is available here.)
2. Free printable PDF sewing pattern (pattern link is given below)
4. Sewing machine (Both Janome and Bernina work well for me. Brother is equally good. I made this dress using my Janome sewing machine.)
5. Sewing machine thread (I prefer Gütermann and Coats which are of great quality.)
6. Tape measure
7. Sewing pins
8. Serger (I am using Brother M343D, which works great.)
Size Chart:
This is the size chart I used. Please take your daughter's bust round measurement and compare it with the measurement in the size chart to find the right size for her.
*This chart shows the actual body measurements, not the finished garment measurements.
Seam and Hem Allowances:
Seam and hem allowances are included in the pattern.
Bodice front and back:
Shoulders 3/8 inch
Neckline 3/8 inch
Armholes 3/8 inch
Sides 3/4 inch
Sleeve:
3/8 inch for sleeve cap curve
Pocket:
3/8 inch all around
Hem allowance for the bottom edge is 3/4 inch.
Pattern download links:
Kids' Basic Dress Free PDF Sewing Patter for Sizes 1 Year to 12 Years
Check out this page to find the details of this sewing pattern.
Kids' Cap Sleeve Free PDF Sewing Pattern
How to print and assemble the pattern pages?
Click here to learn how to print and assemble the PDF pattern pages.
How to Sew?
1. Sew the Shoulder Seams.
With right sides of the front and back bodice pieces facing together, sew the shoulder seams together, with a 3/8 inch seam allowance.
2. Serge the sides of the front and back bodice pieces.
3. Sew the neckline
Before sewing the neckline, we will first sew the interfacing to the button and buttonhole extensions. Take two pieces of interfacing and place them over the button and buttonhole extensions. Mark their width equal to 1 3/4 inches and their length equal to the length of the center back. Shape the top edge according to the curved shape of the top of the button and buttonhole extensions.
Press the iron-on interfacing for the button and buttonhole extensions onto the center back of the dress.
Now we will attach bias tape to the neckline to complete the neckline.
Take a long strip of bias-cut fabric with its width equal to 1 1/4 inches. If you don't have a long strip of fabric take a few strips of fabric and attach them as shown in the pictures below to get one long bias strip.
Fold over one of the longer edges by 1/4 inch and press.
Start pinning the bias strip to the neckline like so. Make sure to press the folds of the button and buttonhole extensions, so you will know where it starts.
Sew the bias strip in place.
Fold the bias strip to the wrong side and sew.
We have finished the neckline and the button extensions.
This is how the back of the bodice looks now.
4. Attach the Cap Sleeves
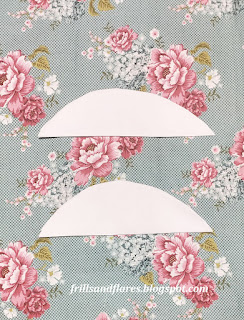
Lay out the sleeve pieces.
Fold each in half as shown in the image below.
5. Attach in-seam pockets to the skirt
This is how the dress looks now on the right side when you match the gathered top edge of the skirt to the bottom edge of the bodice.
I have posted lots of free PDF printable sewing patterns on this page on my blog. Browse through this page to find the patterns you are looking for. You can download and use them to make your own clothes.
Happy sewing!
---Flora


