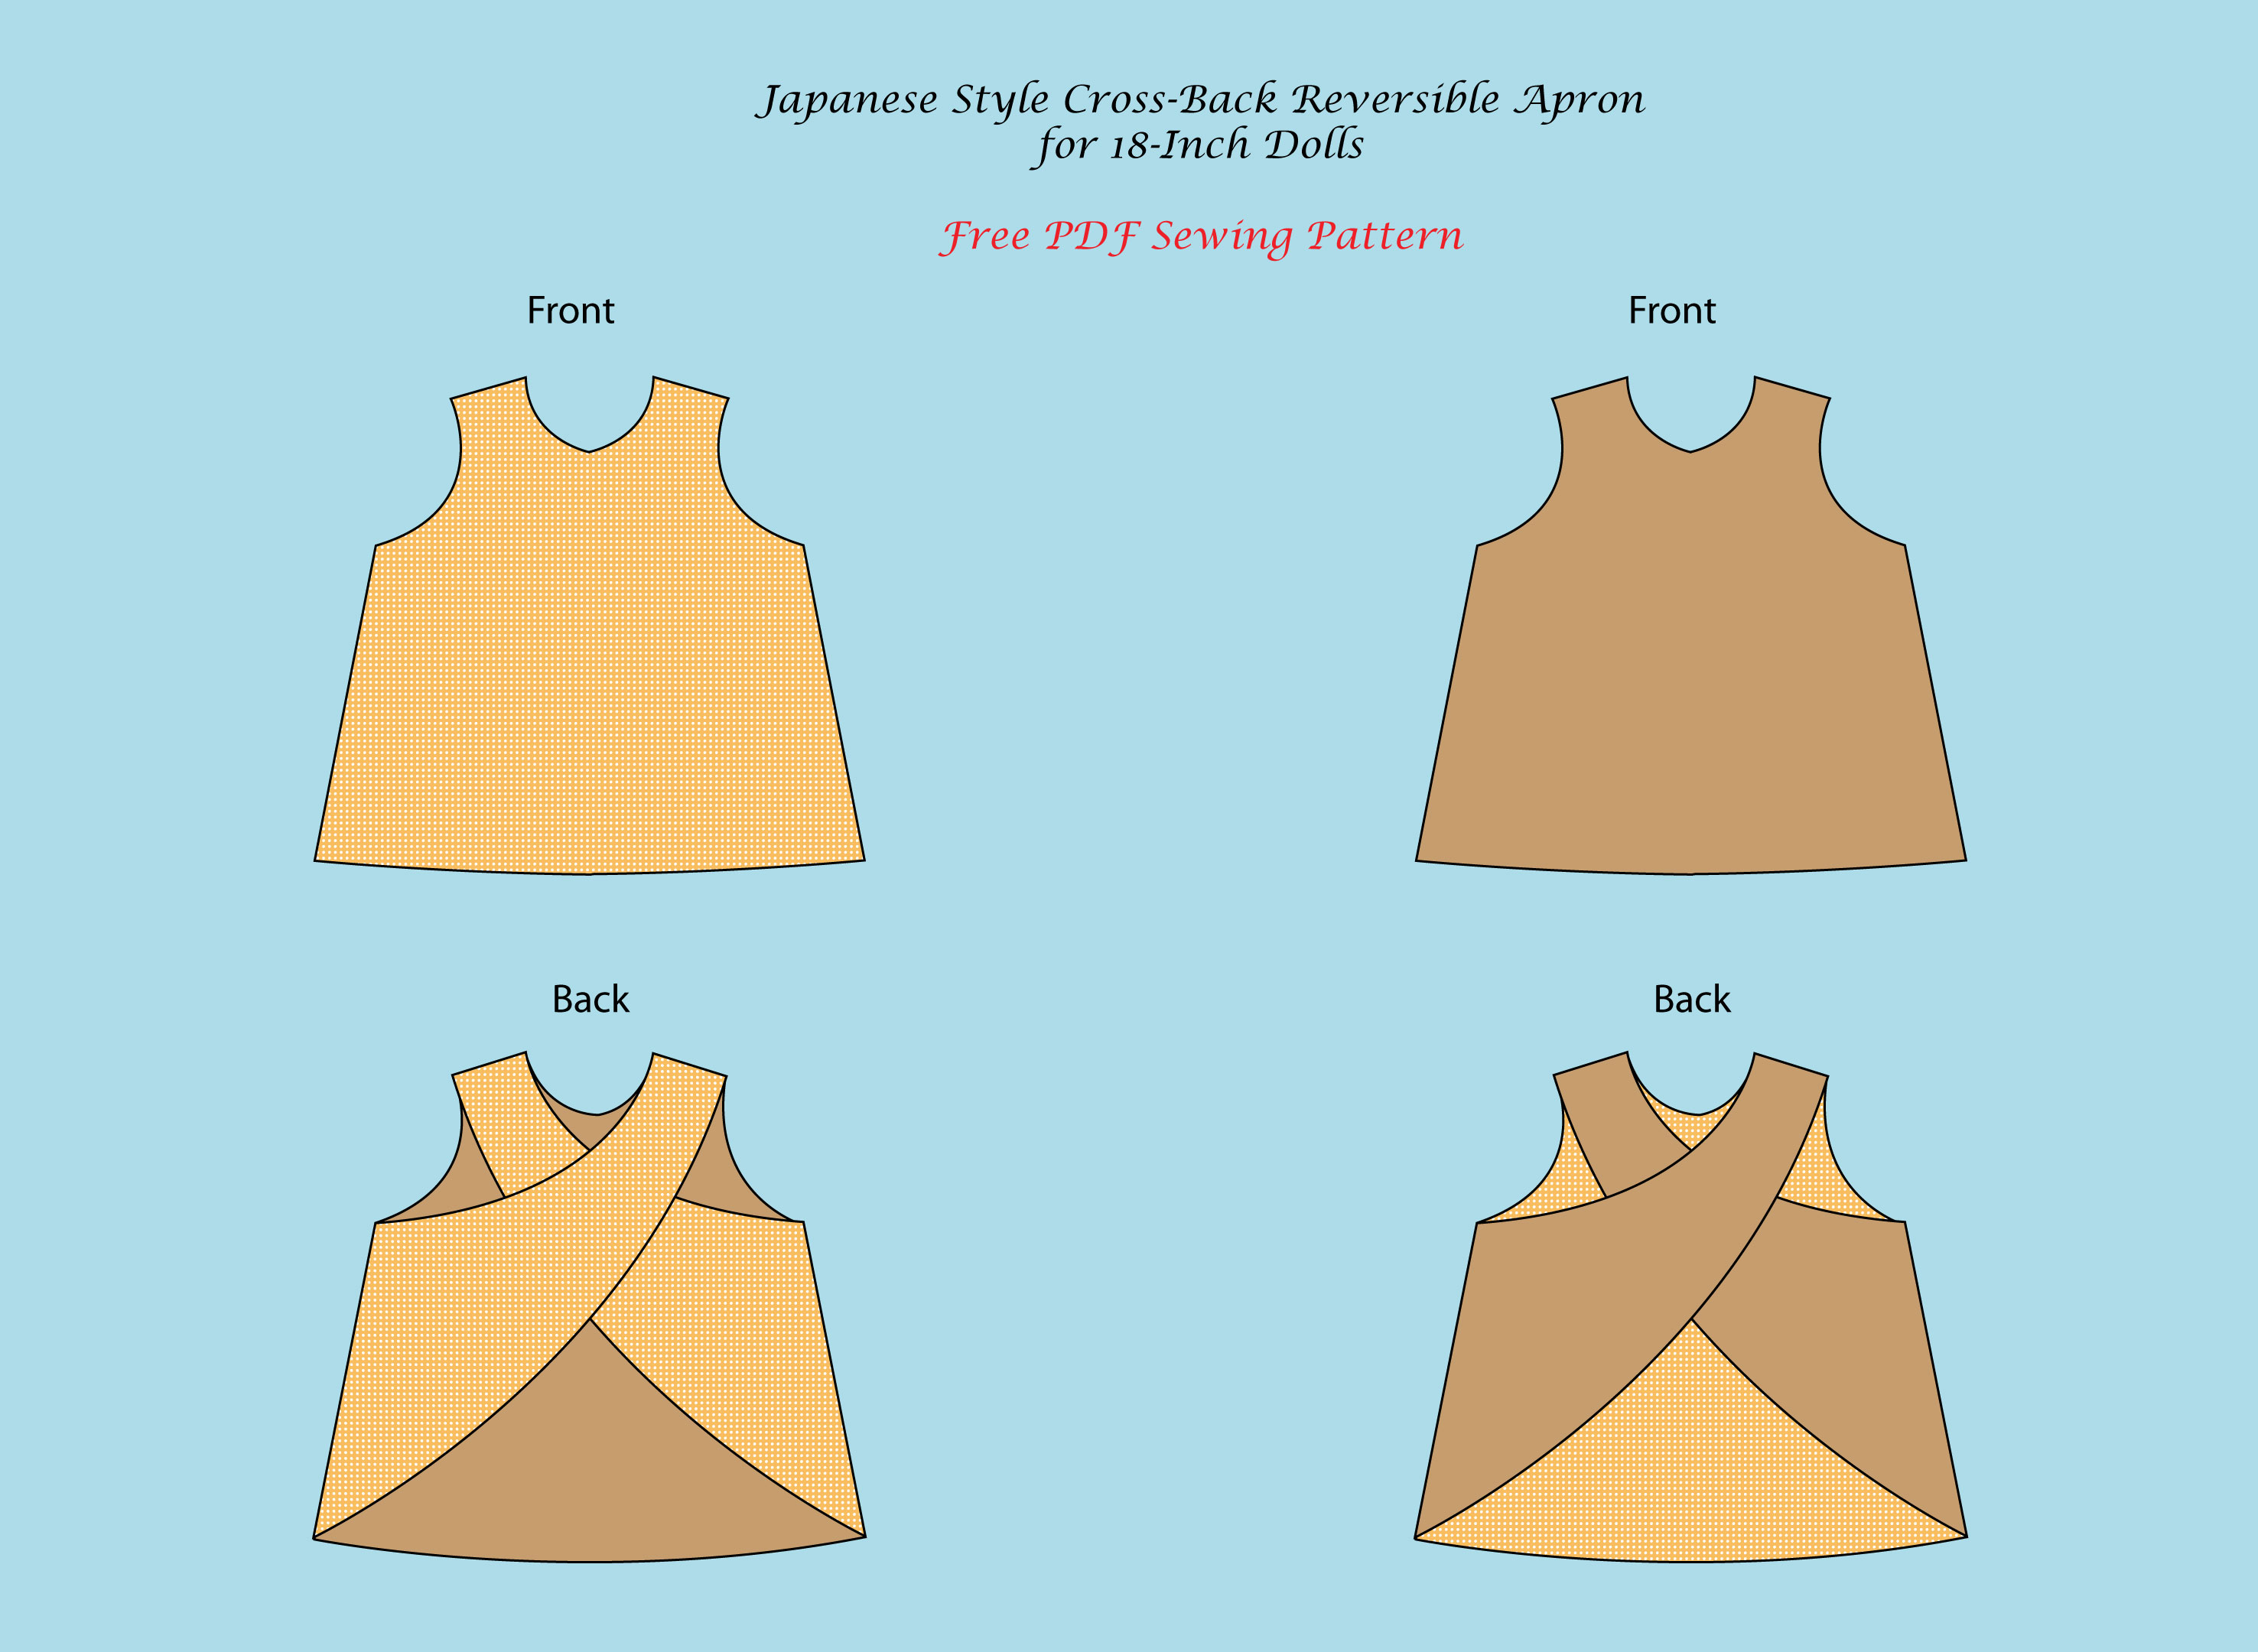
I have designed this reversible Japanese-style apron specifically for kids---sizes 1 year to 12 years. It features overlapping back pieces that criss-cross at the center, creating a stylish and functional design.
The apron is designed to slip easily over your kid's head, so the front neckline has been lowered to accommodate the head circumference. Additionally, the criss-cross back pieces can be widened to ensure a comfortable fit while allowing flexibility when putting the apron on.
As it is reversible, your kid will have two aprons in one.
You can use two contrasting fabrics for the outer and inner sides of the apron to highlight its reversible design.
You can chop a few inches off the hemline to change the apron into a summer top.
Click the link below to browse all the free PDF sewing patterns for women:
I have provided the link to the free pattern below.
Size Chart:
This is the size chart I used. Please take your kid's bust round measurement and compare it with the measurement in the size chart to find the right size for her.
Check out my free 18-inch doll cloth PDF sewing patterns and tutorials:
Click this link for a complete list of 18-Inch Doll Clothes Free PDF Sewing Patterns and Sewing Tutorials
Materials Needed:
- Fabric (cotton, lightweight linen, or knit)
- Matching thread
- Scissors
- Pins or clips
- Sewing machine (or hand-sewing needle)
- Measuring tape
- Iron
Steps to Sew Kids' Reversible Cross-Back Apron:
1. Download the Free PDF Pattern:
How to print and assemble the pattern pages?
Click here to learn how to print and assemble the PDF pattern pages.

2. Cut the Fabric
- Cut one piece on fold from fabric 1.
- Cut one piece on fold from fabric 2.
3. Sew the Pocket
- With right sides facing, join the two pocket pieces with a 3/8 inch seam allowance, leaving a small gap on any of the sides to turn it inside out.
- Pin the pocket to the apron and top stitch all around, making sure to close the gap you left for the turn-over.
4. Finish the neckline, armhole curve, and the cross-back curve
- With right sides facing, place fabric 2 over fabric 1, and sew the neckline, armhole, and cross-back curve of fabric 1 and fabric 1, with a 1/2 inch seam allowance, as shown in the image below. Leave the shoulder seams and the hemline open.

5. Join the shoulders
- Turn the apron inside out.
- Grab one side of the back shoulders and place it over the opposite front shoulder. Now, slide your fingers through the hemline opening and bring the back shoulder through the front shoulder opening, and turn it over to the wrong side. Match the side seams and sew around. This won't be possible to sew with a sewing machine. So you need to hand stitch them together.
- Repeat this step for the other shoulder seams as well.
6. Hem the Bottom Edge
- Close the hemline opening using machine stitch or hand stitch.
Final Touches
- Trim any loose threads.
- Sew along all the edges (optional)
Now your daughter has a cute reversible Japanese-style cross-back apron!
I have posted lots of free PDF printable sewing patterns on this page on my blog. Browse through this page to find the patterns you are looking for. You can download and use them to make your own clothes.