Search This Blog

Translate

Saturday, November 30, 2024

How to Sew an A-Line Dress with Peter Pan Collar for 18-Inch Dolls? (with Free PDF Sewing Pattern)

Sewing an A-line dress for an 18-inch doll can be a fun project, even for beginners. Here’s a step-by-step guide to help you create a simple and stylish A-line dress.


The measurements of the doll I used are

Chest 11.5 inches
Waist 11 inches
Hip 11.75 inches

This pattern will fit dolls like Our Generation dolls and American Girl dolls and dolls with similar measurements.

I have added some extra ease to make this dress a loose-fit one. 


Check out my other free 18-inch doll cloth PDF sewing patterns and tutorials:


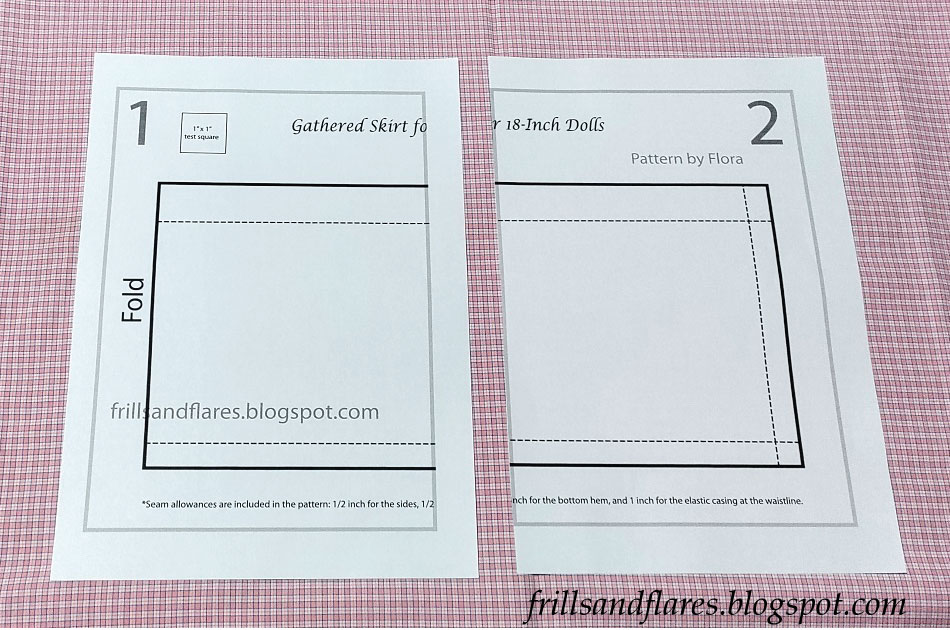
Gathered Skirt with Elastic Waist for 18-Inch Dolls---Free PDF Sewing Pattern


Materials You’ll Need to Make the A-Line Dress


Lightweight fabric (like cotton or a small-patterned fabric that’s easy to work with)

Contrast solid colored fabric for the collar


Matching thread


Velcro or snaps for the closure


Scissors


Sewing pins


A sewing machine or needle for hand sewing


Sewing pattern (Link is given below.)


Steps


1. Download the Free PDF Sewing Pattern

Pattern download link:

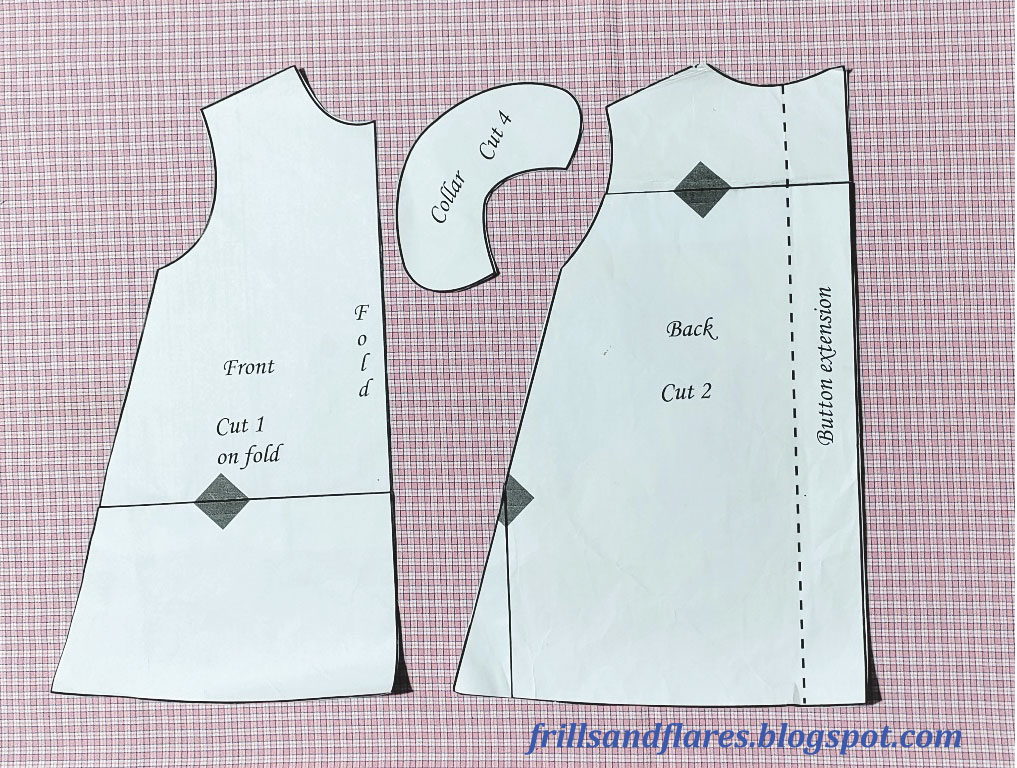
A-Line Dress with Peter Pan Collar for 18-Inch Dolls Free PDF Sewing Pattern

Seam and hem allowances:

Seam and hem allowances are included in the pattern.

Armhole: 1/4 inch

Neckline: 1/4 inch

Side seams: 1/2 inch

Collar pieces: 1/4 inch on all sides

Button extension at the center back is 1 inch in width.

Hem allowance is 3/4 inch (I wanted to have a wider hem fold. So I have kept the hem allowance to 3/4 inch. However, if you want a narrower hem fold, you can reduce the hem allowance to 1/2 inch and adjust the height accordingly.)  


How to print and assemble the pattern?

Check this tutorial to learn how to print and assemble the PDF sewing pattern.


2. Cut Out the Fabric


Fold your fabric in half with the pattern pieces pinned to it. Trace around the pattern.


Cut one front piece on fold. 


Cut two back pieces.


Cut four collar pieces.


This is how the fold looks sideways.


Place the collar pattern template over the folded fabric.


Trace around the collar pattern and cut out the pieces from the fabric.


You will now have four collar pieces.


3. Sew the Shoulder Seams


Place the front and back pieces with right sides facing.


Sew the shoulder seams with a 1/4 inch seam allowance. 


Press open the seams and serge the raw edges. (You can serge the raw edges before you join the shoulder seams. That would be even easier to do.)


4. Finish the Armholes and Side Seams


Cut 1-inch-wide bias strips from the fabric with length a little more than the armhole curve measurement.


With right sides together, pin a bias strip to one of the armholes.


Sew it in place. 


Make small slits all around the armhole curve.


Fold the bias strip down the wrong side to cover the stitch line and sew over the fold. 


This is how it looks on the right side.


Trim the extra lengths of fabric from both the ends of the bias strip, and with right sides together match the side seam allowances of the dress using fabric clips, and then sew (leaving an 1/2 inch seam allowance).


.


Press open the seams and finish the raw edges using a serger, or zig-zag stitch on the sewing machine, or using pinking shears. You can do this step before sewing the sides together, as it would be much easier.


Now fold the bias strip to the wrong side and hem. I did blind hem by hand to keep it neat.


Repeat step 4 for the other armhole and side seam.


This is how the dress looks on the right side at this stage of the project.


5. Finish the Back Closures


Fold the back edges down the wrong side of the dress to create a clean edge, first by 1/4 inch and then by 3/8 inch.


Sew along the folded edges.


Trim the top end of the folded back closure to the shape of the neckline.


6. Attach the Collars and Finish the Neckline


With right sides together, join two collar pieces, leaving the neckline side open.


Trim the outer curved edge of the collar with pinking shears or make small slits on the curve of the collar using scissors. This is to give your collar a nice shape


Turn it inside out and press.


Repeat the same for the other collar on the other side.

On the front neckline, mark the center front. Position the collar pieces on both sides of this center front mark, pin, and sew (seam allowance is 1/4 inch).


I have left a little gap between the collars to attach a ribbon later. But you can sew the collars close together if you don't want to add any embellishment. 

Attach a 1-inch-wide bias strip (in the same color as the collar) over the collar pieces.


Trim both the ends of the bias trip leaving only a 1/2-inch trail of fabric. 
Trim the attached edge of the bias strip with pinking shears or make small slits using scissors.


Fold down the ends of the bias strip, and then fold the bias strip down the wrong side to hide the stitch line.


Fold again and hem. I did blind hem by hand.


This is how the dress looks at this stage.


7. Finish the Hemline of the Dress


Fold the hem of the dress up about 1/4 inch, then fold again by 1/2 inch and sew to prevent fraying and to give the dress a finished look.


8. Add Any Final Touches


You can add small embellishments, such as a bow, buttons, or lace trim, if you like.


Sew or attach Velcro strips (which are 1/2 inch in width and the length equal to the center back length) (or snaps) along the back opening to allow the dress to open and close.


Your A-line dress is now ready! You can adjust this basic pattern to add details like puffed sleeves or trim to make the dress unique.


I have posted lots of free PDF printable sewing patterns on this page on my blog. Browse through this page to find the patterns you are looking for. You can download and use them to make your own clothes.


You can also click the Free Sewing Patterns Page at the top of this blog page (under the blog title) to find more free sewing patterns.

Click the links below to browse through all the pattern drafting and sewing tutorials on my blog.


Happy sewing!

---Flora


Thursday, November 21, 2024

How to Sew a Gathered Skirt with Elastic Waist for 18-Inch Dolls---with Free PDF Sewing Pattern

Sewing an elastic waist skirt for an 18-inch doll is a fun and easy beginner project! It's one of the best ways to use your scrap fabrics. 


The measurements of the doll I used are

Chest 11.5 inches
Waist 11 inches
Hip 11.75 inches

This pattern will fit most of the 18-inch dolls like Our Generation dolls and American Girl dolls.

Here's the step-by-step sewing tutorial. The link to the free PDF pattern is given below.


Check out my other free 18-inch doll PDF sewing patterns and tutorials:


Let's dive into the sewing tutorial:


Materials Needed:


Fabric (lightweight cotton or similar. I used a polka dotted lightweight cotton fabric.)


Elastic (1/2-inch width, about 8–10 inches long)


Sewing machine or needle and thread


Scissors


Measuring tape 


Sewing pins or clips


Safety pin


---


Instructions:


1. Download the free PDF pattern for the skirt


Download link to the pattern:


18-Inch Doll Gathered Skirt with Elastic Waist---Free PDF Sewing Pattern


How to Print and Assemble the PDF Pattern Pages:


This PDF pattern has two pages to print.

This is the pattern assembly diagram:

Print the two pages and cut the left margin of page 2.


Place the left margin of Page 2 on top of the right margin of Page 1 and paste them together.


Cut out the pattern template.


2. Cut the Fabric

Fold the fabric in half.

Using the pattern template, cut the long rectangular piece of fabric for the skirt.


3. Sew the Side Seam


Fold the rectangular piece of fabric in half with the right sides together. Align the edges and pin. Sew the side seam with a 1/2-inch seam allowance. Backstitch at the beginning and end for durability.


4. Finish the Side Seam


Trim the seam allowance and finish it with a serger, zigzag stitch or pinking shears to prevent fraying.


5. Hem the Bottom Edge


Fold the bottom edge of the fabric up by 1/4 inch and press.


Fold again another 1/4 inch to hide the raw edges and press.


Pin in place and sew a straight stitch along the folded edge.


This is how it looks on the right side.


6. Create the Waistband


Fold the top edge of the fabric down by 1/4 inch, then fold it again by 3/4 inch to create a casing for the elastic.


Sew close to the folded edge, leaving a 1-inch opening to insert the elastic.


7. Insert the Elastic


Take an 8 to 10-inch-long elastic. (The doll's waist circumference is around 11.5 inches. So the length of the elastic can be 1 to 3 inches lesser than that, depending on the stretchability or elasticity of the elastic and how fitter you want the waist of the skirt to be. For example, the type of elastic I used in this project was a braided elastic that can stretch more. So I used only 8 inches of it.)

I always mark the length on the elastic instead of cutting it out to the correct length, so it will be easier to thread it through the casing. 


Attach a safety pin to one end of the elastic and thread it through the waistband casing.


Make sure the other end of the elastic doesn't slip inside the casing by pinning it in place.


8. Sew the Elastic Ends

Once the elastic is fully threaded through, cut through the length marking on one end.


Remove the safety pin from the other end, and overlap the ends by 1/2 inch and sew them together securely using a zigzag stitch or several straight stitches.


9. Adjust and Finish


Distribute the gathers evenly around the waistband.


Close the opening in the waistband with a straight stitch.


Your elastic waist skirt is now complete! We have turned a rectangular piece of fabric into a beautiful skirt! You can sew as many of these doll skirts as you like from all the scrap fabrics you have, as it is very easy to make.


Dress your doll and enjoy the finished look!


I have posted lots of free PDF printable sewing patterns on this page on my blog. Browse through this page to find the patterns you are looking for. You can download and use them to make your own clothes.


You can also click the Free Sewing Patterns Page at the top of this blog page (under the blog title) to find more free sewing patterns.

Click the links below to browse through all the pattern drafting and sewing tutorials on my blog.


Happy sewing!

---Flora


Housewarming Gifts