Search This Blog

Translate

Monday, September 23, 2024

Free PDF Sewing Pattern---Women's Tie Front Peplum Top for Bust Sizes 30 to 44 (Sizes XS to XXL) (Ganni inspired)


Here's another free PDF sewing pattern for women. This is a pattern for tie front gathered peplum top for women's bust sizes 30, 32, 34, 36, 38, 40, 42, and 44 (that is, sizes XS to XXL).

The sleeves are puff sleeves with fullness at the sleeve cap and at the hemline. Sleeve length is up to the elbow. 


*Please note: In the sleeve pattern in the PDF, the sleeve front is on your right side, and the sleeve back is on your left. 

*This pattern is for non-commercial use only.

The pattern download link is given below.

Click the link below to browse all the free PDF sewing patterns for women:


Click the link below to browse all the free PDF sewing patterns for kids:


Click the link below to see the complete list of Free PDF Sewing Patterns for 18-Inch Dolls:


This is the measurement chart I used to create this pattern. Please select your pattern size according to your bust size. 


Seam allowances:

Seam allowances are included in the pattern.

Top's bodice part:

1/2 inch for the neck line, armholes, and the center front

1 inch for the sides


Sleeve:

1/2 inch for the sleeve cap

1 inch for the sides

3/4 inch at the hemline


Top's peplum part:

For the peplum part of the top, you will need a rectangular piece of fabric with width (i.e. height of the peplum) that is equal to your waist to hip measurement (you can decrease the height as per your preference) and length that is 1.5 or 2 times (according to where you want to have the seams and how much fullness you prefer) the bottom round measurement of your stitched bodice. You will create gathers on the top of this rectangular piece to make its length equal to the bottom round measurement of your stitched bodice and then sew them together on the wrong side.

Here's a diagram to help you with this:


Seam allowances for the peplum part of the top:

1/2 inch for the top of the rectangle
1/2 inch for the bottom hemline of the rectangle
1/2 inch on each of the width sides to attach the bias tape at the center front (if you want the peplum to be open at the center front.) (But you can keep the center front closed as well.)
(or)
if you want the peplum to be closed at the center front, leave a 1/2-inch seam allowance on the width sides (i.e., the shorter edges) and join at the center front.
(or)
If you want the seams to be on the sides, then cut the rectangular piece vertically into two pieces, add 1 inch seam allowances on all the four width sides (i.e., the shorter edges). Sew the shorter sides of the two rectangular pieces together, gather them at the top, and pin it to the bottom round of the bodice, making sure you match the side seams of the bodice and peplum and sew them together on the wrong side.


Download link:


How to Print and Assemble the PDF Pattern Pages:


Supplies Needed:

1. Fabric

2. Measuring tape

3. Matching thread

4. Elastic (1-inch wide; length = waist circumference minus 1 inch)

5. Sewing machine

6. Scissors

7. Safety pin

8. Sewing pins

9. Fabric marker or pencil

10. Serger (optional)


How to self-draft this pattern?

If you want to draft this pattern yourself for your body measurements, check out this link for the detailed drafting tutorial.


Fabric Requirement Chart

Bust Size (inches)Fabric Required (44” wide)Fabric Required (58” wide)Tie Strings
30 (XS)1.6 meters (1.75 yards)1.3 meters (1.4 yards)Included in above; 0.2m extra if contrast
32 (S)1.6 meters (1.75 yards)1.3 meters (1.4 yards)Included in above; 0.2m extra if contrast
34 (S)1.7 meters (1.85 yards)1.4 meters (1.5 yards)Included in above; 0.2m extra if contrast
36 (M)1.7 meters (1.85 yards)1.4 meters (1.5 yards)Included in above; 0.2m extra if contrast
38 (M)1.8 meters (2 yards)1.5 meters (1.65 yards)Included in above; 0.2m extra if contrast
40 (L)1.8 meters (2 yards)1.5 meters (1.65 yards)Included in above; 0.2m extra if contrast
42 (XL)1.9 meters (2.1 yards)1.6 meters (1.75 yards)Included in above; 0.2m extra if contrast
44 (XXL)1.9 meters (2.1 yards)1.6 meters (1.75 yards)Included in above; 0.2m extra if contrast

Notes:

✅ Fabric estimates include puff sleeves, peplum, and ties in the same fabric.
✅ If using contrast fabric for ties, add 0.2 meters (0.22 yards) of contrast fabric.
✅ Fabric estimates are rounded up for easy cutting layout and pattern placement.
✅ For directional prints, consider purchasing 0.2 meters extra for matching.


How to sew?

1. With right sides facing join the front and back bodices at the shoulders.

2. Attach the sleeves.

3. Join the sides.

4. Gather the peplum skirt and attach it to the bodice.

5. Join the sides of the sleeves and the bodice.

6. Sew the hemline of the sleeves.

7. Finish the neckline by attaching bias tape.

8. Finish the center front. Start pinning a long bias tape to both sides of the the center front. While pinning it, sandwich six fabric ties under the bias tape, three on each side and sew. Turn the bias tape to the wrong side and sew. 

Done!


After creating this pattern, I later realized how it matched with the baby dress I posted on my blog 14 years before. 😊

Please check the link below to get some idea on how to attach the bias strips to the blouse's neckline and center front, as well as the fabric ties. 


You can completely hide the bias tape under, or you can use a contrast fabric as shown in the baby dress sewing tutorial.

You can attach the fabric ties in different ways you prefer. You can sandwich the fabric ties under the bias tape, and then fold down the bias tape; attach them after you have folded down and sewn the bias tape; or attach them on the outside over the bias tape. The design choice is up to you!


I will soon post a step-by-step picture tutorial. 

If you are looking for a PDF pattern for a side tie top with ruffle hem, click the link below:


Here's the 18-inch doll version of the top:


Click on the link Free Sewing Patterns Page at the top of this blog page (under the blog title) to find more free sewing patterns.

Click the links below to browse through all the pattern drafting and sewing tutorials on my blog.


Happy sewing!

---Flora


Sunday, September 22, 2024

Kids' Basic Dress with Gathered Skirt and Sailor Collar Free PDF Printable Sewing Pattern---Size 8 Years


Here's another free PDF printable sewing pattern for a basic dress with gathered skirt and sailor collar for size 8 years.


Click the link below to browse all the free PDF sewing patterns for women:


Click the link below to browse all the free PDF sewing patterns for kids:


Click the link below to see the complete list of Free PDF Sewing Patterns for 18-Inch Dolls:


Pattern Assembly:

This is how you will assemble the pattern.


Pattern Download Link:


How to Print and Assemble the PDF Pattern Pages:


A detailed tutorial on how to sew and attach the sailor collar to the dress is provided at this link

I have posted lots of free PDF printable sewing patterns on this page on my blog. Browse through this page to find the patterns you are looking for. You can download and use them to make your own clothes.


You can also click the Free Sewing Patterns Page at the top of this blog page (under the blog title) to find more free sewing patterns.

Click the links below to browse through all the pattern drafting and sewing tutorials on my blog.


Happy sewing!

---Flora


Sunday, September 15, 2024

Free Printable PDF Sewing Pattern---Kids' Elastic Waist Pants---Sizes 1 Year to 12 Years


While making a pair of elastic waist pants for my younger daughter, I made a sewing pattern in a range of sizes from 1 year to 12 years and wanted to share it with you all.


You can sew these pants in just 30 minutes. It's that easy.

I have made the pattern to be  printed on both A4 papers and A0 paper.


Click the link below to browse all the free PDF sewing patterns for women:


Click the link below to browse all the free PDF sewing patterns for kids:


Click the link below to see the complete list of Free PDF Sewing Patterns for 18-Inch Dolls:


Download link for A4 size pattern pages:

Kids' pants free PDF sewing pattern---A4 size pattern pages


Pattern Assembly:

Use the below diagram as a guide to assemble the pattern pages printed on A4-size papers.


Download link for A0 size pattern page:

Kids' pants free PDF sewing pattern---A0 size pattern page


Size Chart:

This is the size chart I have used for making this pants sewing pattern:


Select the correct size according to the hip round measurement in the size chart. Measure your kids' height too. If your kid is taller for their age, add the required inches to the hemline to increase the length of the pants. Or if shorter, then cut off a few inches.

How to Print?

Print the pages on A4-size papers. Make sure you have set page sizing to "Actual size" before you print the pattern.

Do not select the "Custom scale" option or the "Choose paper size by PDF page size" option.

You can measure the 1 inch x 1 inch square in the pattern page to check whether the page has printed correctly.

Check this tutorial on how to print and assemble the PDF pattern pages.


Seam and Hem allowances:

Seam and hem allowances are already included in the pattern. These are:

1.5 inches at the waist to make the casing for the elastic.

0.5 inches for the side seams.

3/8 inch for the crotch seam and inside leg seam (inseam).

1.25 inch for the bottom hem allowance.


Supplies:

1. Fabric. The fabric I used for this project was sourced from The Square Inch online store. You can find similar fabric from here in UK and here in the US.

2. Measuring tape

3. Matching thread

4. Elastic Width: 3/4 inch wide; Elastic Length: Measure your waist circumference and subtract 1 inch for a standard fit, or 2 inches if you prefer the waistband to fit more snugly.

5. Sewing machine

6. Scissors

7. Safety pin

8. Sewing pins

9. Fabric marker or pencil

10. Serger (optional)

This is the fabric I used to make the pants.


After printing and assembling the pattern pages, trace the pants front and back patterns on a tracing paper, and use these traced patterns to cut the patterns out from fabric. 


Pants front


Pants back


Now, as we have our patterns cut out from fabric, let's start sewing the pants.


How to sew?

1. Join the sides.

Serge the side, crotch, and inseam and side seam edges of each pattern piece of the pants. 


With right sides of the front and back fabric pieces facing, join the sides of the pants. (I have shown the side seam lines with red dashed lines in the picture below.)


Open the seams and press them flat.


2. Sew the center seam (crotch seam).

With right sides facing, sew the center seam or crotch seam of the front together. Stop at the bottom of the crotch seam and leave the leg part open. (I have shown the crotch seam lines with red dashed lines in the picture below.) Repeat this step for the back as well.


3. Sew the leg seam (inseam).


Join the leg seam (inseam) (shown with red dashed line in the image below).


Before joining the leg seams, open the crotch seams and press them flat. Make sure that the lower edge of the crotch seam remains flat while you sew the leg seam.


4. Finish the hemline of the pants.

Fold the leg hemline 1/2 inch down the wrong side and press. 


Then fold again 1 inch down the wrong side and press.


Sew along the folded edge.


Repeat the same steps for the other leg.


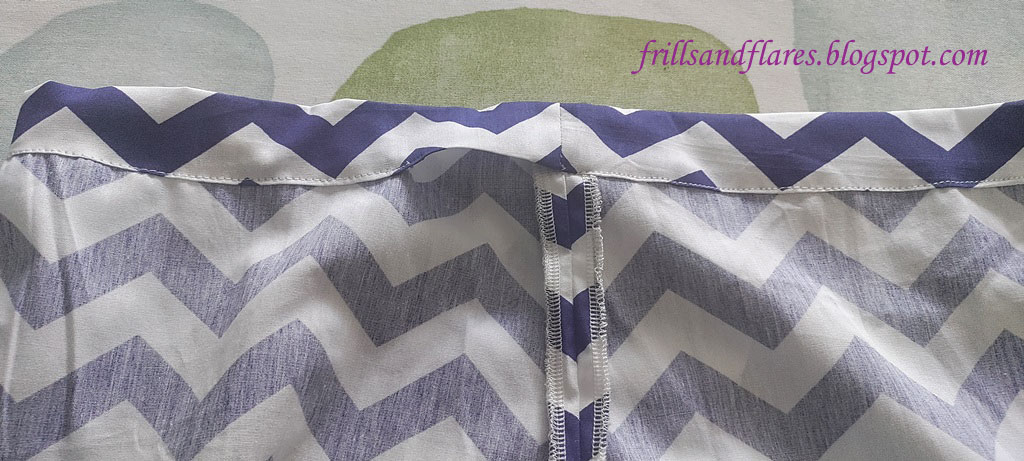
5. Finish the elastic waist.

Fold the waistline half inch to the wrong side and press.


Then fold again 1 inch and press. Sew along the lower edge of the fold to create the casing for the elastic.


Leave a gap of 2 inches in the casing at the center back to insert the elastic.


Take a 3/4-inch-wide elastic with length equal to the waist round of the body measurement minus 1 inch. I have marked this length on the elastic.


Pin a safety pin on one end of the elastic, and feed the elastic through the casing you just created. 


Scrunch the casing to bring the elastic from the other side. When you back at the starting point, cut the elastic at the marking.


Match up the ends of the elastic, overlap the ends by about 1/2 inch, and sew them together using two or three rows of  zigzag stitches.


While closing the casing, insert a piece of ribbon or a tag at the center back and sew the gap closed. as it will help identify the back of the pants. 


And we are done!

A new pair of pants is ready now. You can easily make this!


If you want to make these pants in women's size, check the out the free PDF sewing pattern at the link below:

Women's Pants with Elasticated Waist---Free PDF Sewing Pattern and Sewing Tutorial


Also, check the below link for women's shorts free PDF sewing pattern:

Women's Shorts with Elasticated Waist---Free PDF Sewing Pattern and Sewing Tutorial


For your convenience, I’ve grouped my blog posts into the sections below—hope you find them helpful!


You’ll also find these links at the top of my blog in the navigation bar.

Happy sewing!  

---Flora