Search This Blog

Translate

Friday, June 14, 2024

Kids' 8-Gore Flared Skirt---Sewing Tutorial + Free PDF Printable Sewing Pattern---Size 1 to 12 Years

I'm so excited to share this new 8-gore flouncy skirt PDF sewing pattern I have created for girls' sizes 1 to 12 years. 


This skirt can be made from a light weight fabric for summer or from a medium weight fabric for winter.


This beginner friendly skirt features 8 panels (also known as gores) that flare at the bottom. These panels are attached together to give an overall twirly effect. 


Fabric Suggestion:

Choose plain fabrics or fabric with tiny prints to make this skirt. You can choose light weight woven fabrics like quilting cotton, poplin, satin, etc., or medium-weight fabrics like cotton chambray, linen, or cotton twill.

Size Chart:

This is the size chart I have used for making this sewing pattern:


Select the correct size according to the hip round measurement in the size chart.

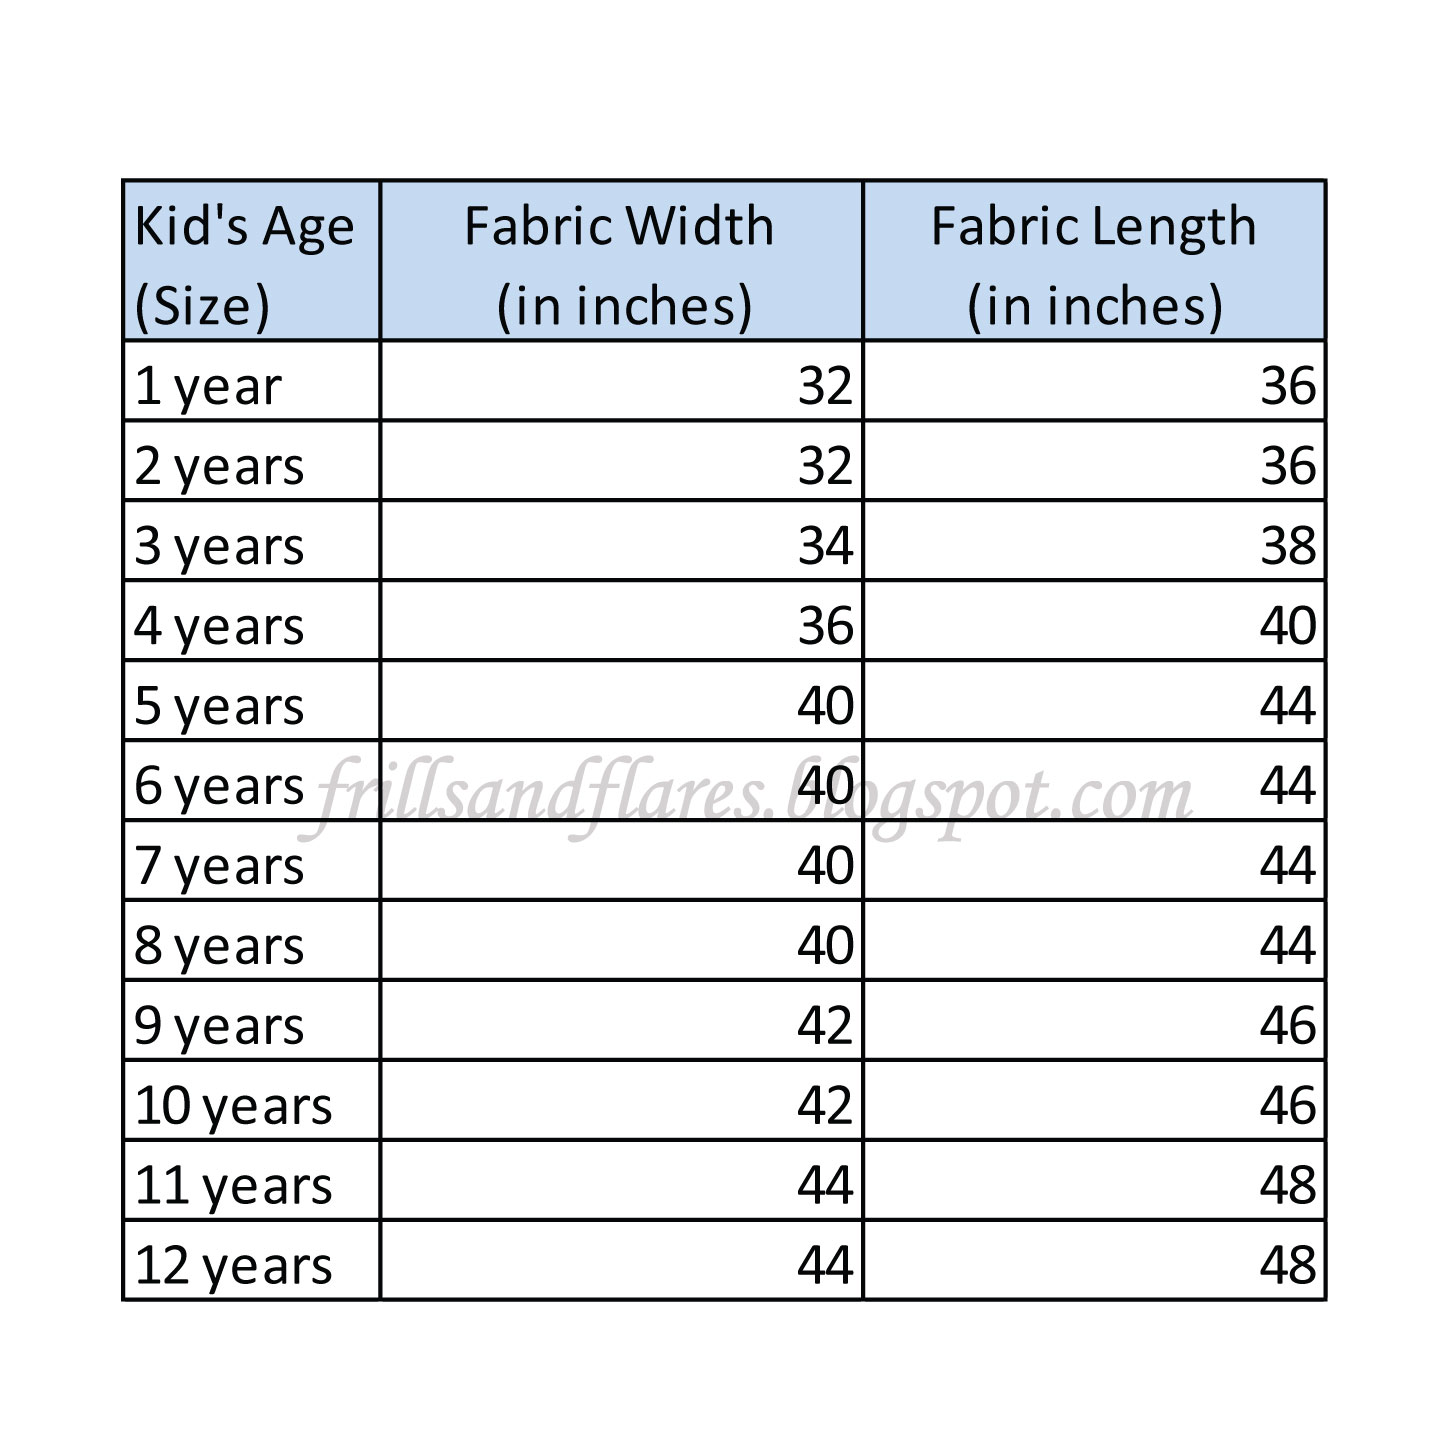
How much fabric do you need for this skirt?

You will need about 1 yard 
of fabric for sizes 1 to 4  and 1 1/4 yards of fabric for sizes 5 to 12. Please refer to the fabric requirement chart below.


And here is the download link for the free PDF sewing pattern:


How to Print?

Print the pages on A4-size papers. Make sure you have set page sizing to "Actual size" before you print the pattern.

Do not select the "Custom scale" option or the "Choose paper size by PDF page size" option.

You can measure the 1 inch x 1 inch square in the pattern page to check whether the page has printed correctly.


Pattern Assembly:

This is how you will assemble the pattern.


Seam and Hem Allowances:

Seam and hem allowances are included in the pattern.


Front and back center gores: 3/8 inch for the top seam and the side seams, and 3/4 inch for the hemline.

waistband: 0.25 inch for the top fold, 1/2 inch for the side seams, and 3/8 inch for the bottom seam.


Pattern pieces:


Front center gores:


Front side gores:


Repeat the same for the back.


How to Sew:

Step 1: 

Serge the raw edges of the sides of each panel before joining them together.


Step 2:

Join the center gores with a 3/8 inch seam allowance.


Step 3:

Join the side gores to the right and left of the already joined center gores from step 1, with a 3/8-inch seam allowance. 

Open the seams and press them flat like so.


This will look like this on the right side.


Then join the side seams with a 3/8-inch seam allowance.


Lastly, sew stay stiches on both sides each seam (about 1/8 inch from the seam).


Step 5:

Hem the skirt.

Fold the hemline down 1/4 inch. Press. And fold again 1/2 inch. Press. Then sew close to the folded edge (about 1/8 inch). If you prefer, sew another row of stiches close to the hemline as well. This will give a beautiful finish to the hemline.


Step 6: 

Join the waist band to the skirt.

Fold the top edge of the waistband down 1/4 inch.


Join the sides of the waist band with a 1/2 inch seam allowance and match the lower edge of this side seam with either the right or left side seam of the skirt. Pin them together. And then proceed to pin the lower edge of the waist band with the top edge (waistline) of the skirt. Join these with a 3/8 inch seam allowance. 


Fold down the waist band in half to cover the waistline seam you have just sewn. Then sew close to the folded edge (about 1/8 inch) leaving a gap of 2 inches to insert the elastic.


Step 7: 

Insert the elastic into casing.

Take an elastic that has a length of 1 inch less than your kids waist circumference and has a width of 1 1/2 inches. Attach a safety pin on one side.


Insert the safety pin edge of the elastic into the casing through the 2 inch opening.


Overlap the ends of the elastic by 0.5 inch and place a few stitches over the overlap to secure the ends of the elastic. Sew the opening closed.


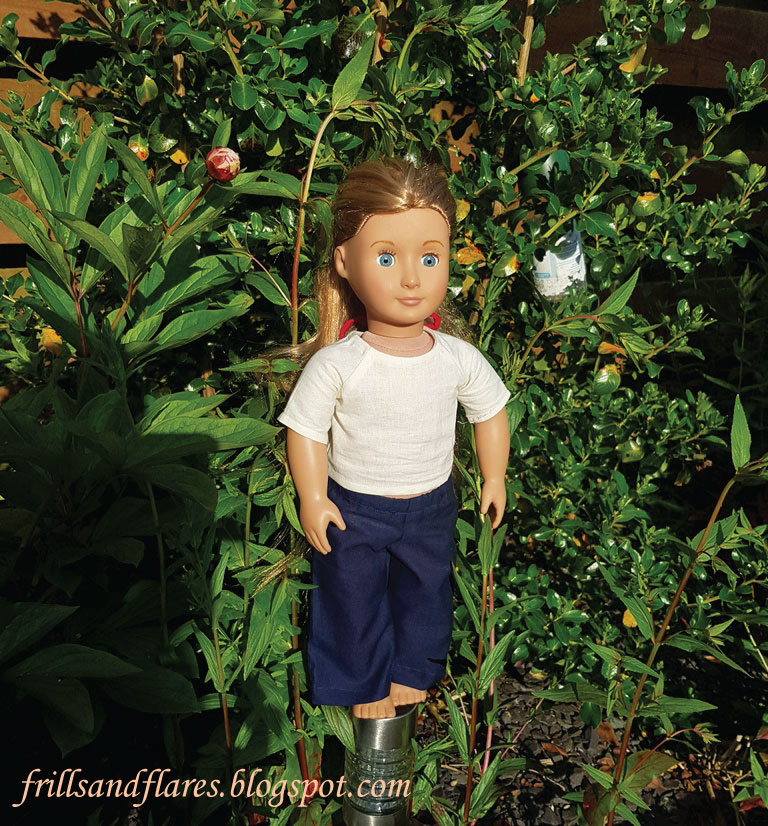
Done! Now you have it--the 8-gore flouncy skirt for your little angel!


Do check out these free PDF sewing patterns, if you are interested:

Kids' A-line Skirt---Size 1 to 12 Years

Kids' A-line Dress---Sizes 6 to 12 Years


I have posted loads of free PDF printable sewing patterns for kids, women, and 18-inch and 12-inch dolls on this page on my blog. Browse through this page to find the patterns you are looking for. You can download and use them to make your own clothes.

You can also click the Free Sewing Patterns Page at the top of this blog page (under the blog title) to find more free sewing patterns.

Click the links below to browse through all the pattern drafting and sewing tutorials on my blog.


Happy Sewing!

---Flora


Saturday, June 8, 2024

How to Sew Night Pants (Pajama Pants) with Elasticated Waist for 18-Inch Dolls + Free PDF Printable Sewing Pattern

Earlier, I had posted the free PDF printable sewing pattern for doll night pants. 

Here's how to sew night pants for an 18-inch doll. It's very easy to make. This is one of the beginner-friendly sewing projects.


Materials needed:


3. Elastic (width 3/8 inch, length 10 inches)

4. Scissors

5. Sewing machine

6. Matching thread

7. Measuring tape

8. Serger (optional) or pinking shears


How to cut the pattern pieces?

Print out the pattern on A4 papers.


Trim the left edge of Page 2 of the pattern. 


Glue or tape the pages together aligning the pattern lines, and then cut out your pattern pieces.


Here's how you cut out the pattern pieces from the fabric.

Place the front pattern piece of the pants on a folded fabric.


Trace around the pattern on the fabric. 


Cut out the traced pattern. Make sure you keep the fabrics together by pinning them together or placing a weight over the traced pattern. 

This how it looks once you cut it out.


Once you are done, cut through the center fold (the white line in the above picture), so you get two pattern pieces for the front left and right.


Repeat this step for the back of the pants as well.


Now we are ready with the pattern pieces to make the night pants:


Front pieces


Back pieces


How to sew the pants?

Let's start sewing. 

Step 1: Join the sides.

Usually we finish the hemline as the last step as the hemline fold conceals the side seam from peeking out . But if you think you have to sew around a narrow round of hemline, you can finish Step 4 now and then proceed with Step 1. I didn't find any difficulty sewing the hemline in Step 4. 

Place the back pieces right side up. Place the front pieces (right side down) over the back pieces, as shown in the picture below. 


Now, join the sides of the pants (with a 0.25-inch seam allowance)


Finish the seam edges with a serger or using zig-zag stitches, or clip the seam edges with pinking shears.


Step 2: Join the crotch seams.

After joining the side seams, this is how it looks like on the wrong side. 


With right sides together align both the pieces, such that back aligns with back and front aligns with front, so we can sew the front and back crotch curve seams. 


Sew the crotch seams with 0.25 inch seam allowance.


Serge the raw edges or use your preferred method to finish the raw edges.


Bring the crotch curve seam to the center. The leg seam is open now. 

This is how the pants will look like now:


Step 3: Join the leg seams.

Pin the the leg seams together and sew (with a 0.25-inch seam allowance) as shown in the image below.


Serge the raw edges of the leg seam.

Step 4: Hem the bottom edge of each leg of the pants.

Fold the right leg hemline 0.25 inch to the wrong side and press.


Then fold again 0.5 inch inward and press. 


Sew along the folded edge. Repeat the same steps for the left leg.


Step 5: Create casing at the waistline and insert the elastic.

Fold the waistline down by 0.25 inch and again by 0.50 inch. Sew along the folded edge leaving a 2-inch gap to insert the elastic.


Take a 3/8-inch-wide, 10-inch-long elastic.


Insert the elastic through the casing using a safety pin, Overlap the edges of the elastic by 0.5 inch, and secure the ends of the elastic by running zig-zag stitches back and forth on the overlap a few times. Then, sew the 2-inch gap closed.


Turn the pants inside out. Done!

You have made a beautiful pair of pants for your little girl's doll.


I have posted lots of free PDF printable sewing patterns on this page on my blog. Browse through this page to find the patterns you are looking for. You can download and use them to make your own clothes.


You can also click the Free Sewing Patterns Page at the top of this blog page (under the blog title) to find more free sewing patterns.

Click the below links to browse through all the pattern drafting and sewing tutorials on my blog.


These links appear at the top of my blog on the navigation bar as well.

These links appear at the top of my blog as well.

Happy sewing!  

---Flora